[태그:] Famicom

  • Recommended Ninja Protagonist Games from the 8-bit & 16-bit Era

    (NES / Famicom, SNES / Super Famicom, Sega Genesis / Mega Drive, TurboGrafx-16 / PC Engine)

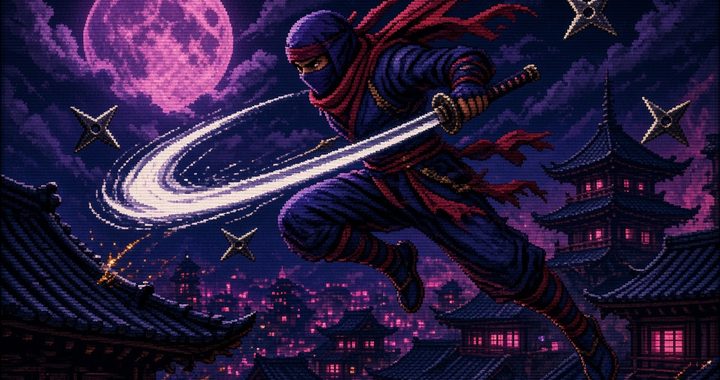
    In the late 1980s and early 1990s, ninjas ruled the arcades and living rooms. Fast, stylish, and often brutally difficult, ninja action games became a staple of the 8-bit and 16-bit generations. Here are two standout titles featuring ninja protagonists on each of the four major systems of the era that still hold up for modern retro players.

    Nintendo Entertainment System (Famicom)

    1. Ninja Gaiden (1988 Japan / 1989 North America) Tecmo’s masterpiece stars Ryu Hayabusa, the Dragon Ninja, on a quest for revenge after his father’s murder. What set this game apart was its cinematic cutscenes (a rarity on the NES), tight wall-climbing and sword combat, and an infamous difficulty curve that still frustrates and delights players today. The combination of precise platforming, secondary weapons (shuriken, fire wheels, etc.), and dramatic storytelling made it a defining ninja experience of the 8-bit generation.

    2. Shadow of the Ninja (1990) Developed by Natsume, this underrated gem lets you play as either Hayate or Kaede (or both in simultaneous co-op) as they infiltrate a dystopian future America ruled by the evil Emperor Garuda. The game features excellent climbing and hanging mechanics, weapon upgrades (katana to kusarigama), and a dark, stylish atmosphere. It plays like a more cooperative, slightly more approachable cousin to Ninja Gaiden and remains one of the best pure ninja action games on the system.

    Super Nintendo Entertainment System (Super Famicom)

    1. The Legend of the Mystical Ninja (1991 Japan / 1992 North America) Konami’s colorful take on the Ganbare Goemon series follows the mystical ninja Goemon (Kid Ying in the West) and his eccentric partner Ebisumaru (Dr. Yang). Blending side-scrolling action, town exploration, mini-games, and light adventure elements, it offers a much more lighthearted and humorous take on the ninja theme. The dual-character co-op, catchy music, and quirky Japanese humor make it a delightful contrast to the darker ninja games of the era.

    2. Hagane: The Final Conflict (1994 Japan / 1995 North America) You control Hagane, a cyborg ninja rebuilt after his clan is wiped out, seeking revenge and the recovery of a powerful artifact. This late-era SNES title mixes classic ninja moves (wall jumps, flips, multiple weapons including sword, chain, shuriken, and bombs) with a cyberpunk aesthetic. Fast, fluid, and challenging, it feels like a spiritual successor to Shinobi and Ninja Gaiden with impressive 16-bit production values.

    Sega Genesis (Mega Drive)

    1. The Revenge of Shinobi (1989) Joe Musashi returns in this stylish sequel that perfected the formula. Beautiful Stage 1 music by Yuzo Koshiro, smooth ninjutsu powers, and a perfect balance of platforming and combat made this one of the early showcases for the Genesis. The combination of shuriken throwing, sword strikes, and special ninjutsu techniques still feels fantastic.

    2. Shinobi III: Return of the Ninja Master (1993) Widely regarded as one of the best pure action games on the Genesis, Shinobi III gives Joe Musashi even better controls, more varied stages, and a refined difficulty curve. Running, sliding, wall-jumping, and the classic shuriken + sword combat reach their peak here. Many consider this the high point of the classic Shinobi series.

    TurboGrafx-16 (PC Engine)

    1. Ninja Spirit (1990) Irem’s excellent port of their own arcade game stars the ninja Moonlight (Tsukikage) seeking revenge for his father’s death. What makes it special is the ability to switch freely between four weapons (katana, shuriken, bombs, and kusarigama) and the ability to summon shadow clones. The TG-16 version is extremely close to the arcade original and stands as one of the system’s strongest pure action titles.

    2. Shinobi (1989 – primarily Japan) Asmik’s HuCard port of Sega’s classic arcade game brings Joe Musashi to the PC Engine. While it trims some content compared to the arcade (most notably Stage 2 and the bonus stages), the core gameplay, graphics, and speed remain excellent. For fans of the original Shinobi, this is still a very enjoyable version and a nice companion piece to Ninja Spirit on the same hardware.


    These eight games capture the full range of what “ninja game” meant in the 8- and 16-bit eras — from the punishing cinematic platforming of Ninja Gaiden to the colorful humor of Mystical Ninja, the cyberpunk style of Hagane, and the refined action of the Shinobi series.

    Whether you’re rediscovering these classics on original hardware, emulators, or modern re-releases (Nintendo Switch Online, etc.), they remain some of the most satisfying and atmospheric action games of their generation.

  • Famicom vs. NES: A Technical and Collector’s Comparison of 8-Bit Classics

    Introduction: The Genesis of Modern Home Gaming

    When retro gaming enthusiasts in North America reflect on the 8-bit era, the image that usually comes to mind is the iconic grey, boxy Nintendo Entertainment System (NES). Released in North America in 1985, the NES single-handedly revitalized a home video game market that had collapsed under the weight of low-quality titles and saturated hardware.
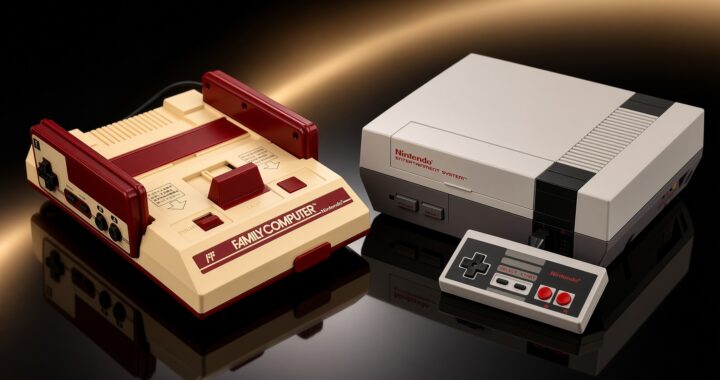
    However, two years before the Western world received its “toaster-style” console, Nintendo launched a red-and-cream revolution in Japan. Released on July 15, 1983, the Family Computer—universally abbreviated as the Famicom—was the true foundation of Nintendo’s home console empire.

    For modern retro gaming collectors, preserving and exploring the original Famicom provides fascinating insights into hardware design, region-specific software releases, and audio engineering. This comprehensive guide explores the rich history, technical nuances, sound enhancements, and unique library of the original Japanese Famicom.

    1. Aesthetic and Industrial Design: Famicom vs. Western NES

    To understand why the Famicom occupies such a special place in video game history, one must first look at the stark design differences between the Japanese original and its Western counterpart.

    The Japanese Vision (1983)

    Designed by Masayuki Uemura, the original Famicom was deliberately fashioned to look friendly, approachable, and affordable.

    • Color Palette: Featuring a distinctive deep crimson (maroon) and off-white plastic shell, the console resembled an inviting toy rather than an intimidating piece of high-end home electronics.
    • Form Factor: Compact and lightweight, the Famicom featured a top-loading cartridge slot, a mechanical eject lever, and built-in side holsters to store the two included controllers.

    The Western Adaption (1985)

    Following the North American video game crash of 1983, Western retailers were deeply skeptical of any product labeled as a “video game console.” To bypass this retailer hesitation, Nintendo of America completely redesigned the housing:

    • Front-Loading VCR Mechanism: The NES was styled to look like a contemporary VCR (Videocassette Recorder), hiding the cartridge slot behind a hinged door.
    • Neutral Tone: The bright crimson was replaced with dark and light grey tones, creating a neutral aesthetic intended to blend seamlessly into living room entertainment centers.

    While both machines shared core 8-bit internal architecture (specifically the Ricoh 2A03 8-bit processor running at approximately 1.79 MHz in NTSC regions), their external designs could not have been more distinct.

    2. Hardware Quirks and Unique Features

    Collecting and playing on original Famicom hardware introduces several unique physical and electrical quirks that set it apart from standard NES consoles.

    Hardwired Controllers and the Player 2 Microphone

    One of the most surprising features of the original Famicom is its fixed controller setup. Unlike the NES, which featured front-facing detachable controller ports, the original Famicom had its two controllers permanently hardwired into the rear of the motherboard.

    Even more intriguing is the controller functionality:

    1. Player 1 Controller: Features standard Directional Pad, A, B, Start, and Select buttons.
    2. Player 2 Controller: Omits the Start and Select buttons entirely. In their place, Nintendo included a small microphone and a volume slider switch.

    While relatively few games utilized this microphone, a notable example is the original Japanese release of The Legend of Zelda (Hyrule Fantasy: Zelda no Densetsu). In the Japanese version, players could defeat the large-eared enemy known as “Pols Voice” by making noise into the Player 2 microphone—a mechanic completely altered for the Western NES release.

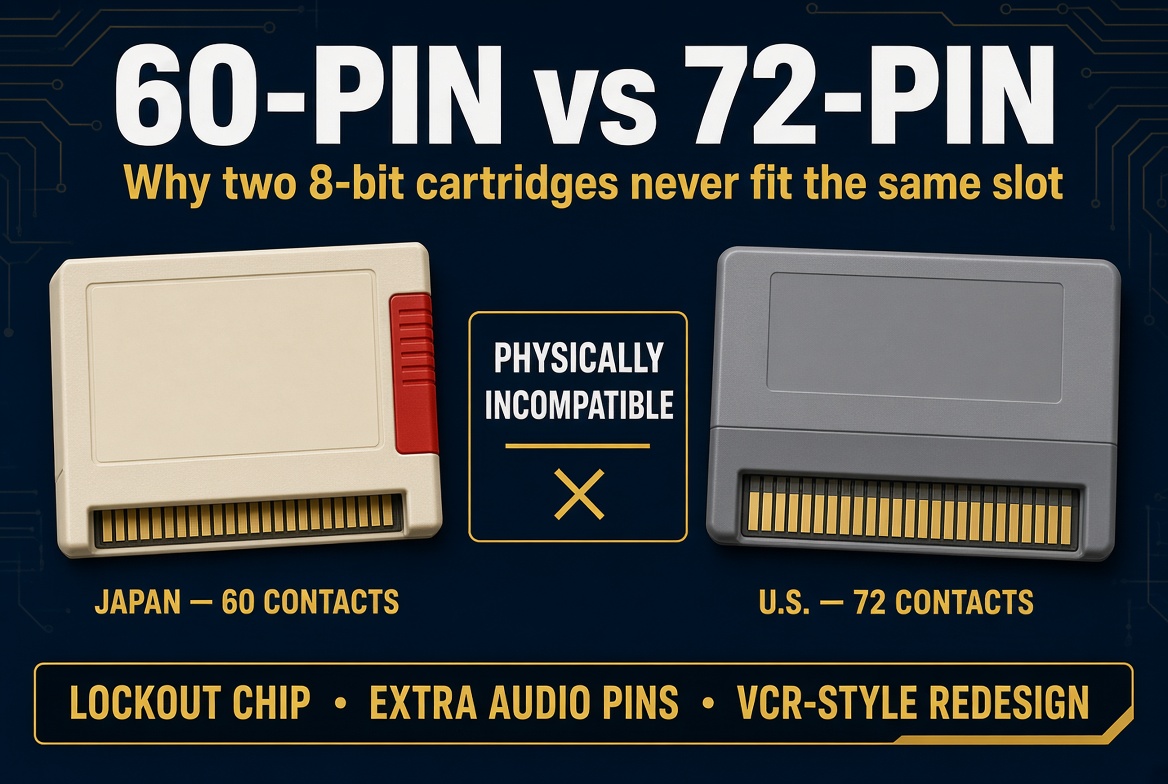
    Cartridge Form Factor: 60 Pins vs. 72 Pins

    The Famicom utilizes a compact 60-pin cartridge format, whereas Western NES cartridges feature a much larger 72-pin format. The extra pins on the NES cartridge connector were primarily added to accommodate the 10NES Lockout Chip (an anti-piracy regional lock mechanism) and expanded audio routing lines.

    3. The Chiptune Masterpiece: Expanded Audio Capabilities

    For sound engineers, music historians, and chiptune enthusiasts, the Famicom possesses a legendary advantage over the stock Western NES: native cartridge audio expansion support.

    How Expanded Audio Works

    The original Famicom cartridge slot was wired to allow game cartridges to route extra audio channels directly into the console’s mixing circuit. Developers could embed custom audio processing chips inside individual game cartridges, supplementing the built-in sound capabilities of the Ricoh processor.

    The standard Ricoh 2A03 chip provided five basic sound channels:

    • 2 Pulse wave channels
    • 1 Triangle wave channel
    • 1 Noise channel
    • 1 PCM Delta Modulation Channel (DMC)

    With audio expansion chips, developers could add complex FM synthesis, extra pulse channels, and custom wavetable audio.

    Landmark Expanded Audio Chips

    • Konami VRC6: Featured in Akumajou Densetsu (Castlevania III: Dracula’s Curse in Japan). It added two extra pulse waves and a sawtooth wave, producing an extraordinarily rich, multi-layered orchestral soundtrack. The Western NES version lacked this chip due to pinout differences, resulting in a significantly simplified audio arrangement.
    • Sunsoft 5B: Used in titles like Gimmick!, this chip delivered deep basslines and rich synthesis that remains a highlight of 8-bit music production.
    • Namco 163: Supported up to eight additional custom wavetable sound channels, featured in games like Rolling Thunder and Final Lap.

    4. The Famicom Disk System (FDS)

    In 1986, Nintendo introduced a major peripheral expansion in Japan: the Famicom Disk System (FDS).

    Solving the Storage and Cost Challenge

    In the mid-1980s, high-capacity ROM chips were extremely expensive to manufacture. The FDS bypassed this limitation by utilizing double-sided proprietary 3-inch floppy disks, known as “Disk Cards.”

    • Rewritable Kiosks: Japanese gamers could take their Disk Cards to retail kiosks called “Disk Writers” and rewrite new games onto them for a fraction of the cost of buying a new cartridge.
    • Save State Support: The magnetic media allowed players to save their progress directly to the disk, eliminating the need for complex, error-prone password systems.

    Historic franchises such as The Legend of Zelda, Metroid, Kid Icarus, and Castlevania actually made their debut on the Famicom Disk System before being converted into standard cartridge formats for Western NES release. Furthermore, the FDS unit contained its own wavetable audio synthesis channel, giving FDS titles a distinct acoustic warmth.

    5. Navigating the Famicom Library: Exclusives and Hidden Gems

    Because the Famicom had an exceptionally long lifecycle in Japan (with official production running until 2003!), its software library is vast, spanning thousands of official releases, unlicensed software, and region-locked gems.

    Notable Famicom Exclusives

    1. Joy Mech Fight (1993): A late-era 2D fighting game developed by Nintendo. It utilized creative sprite manipulation techniques to deliver smooth fighting animations on 8-bit hardware.
    2. Splatterhouse: Wanpaku Graffiti (1989): A delightful, super-deformed (chibi) side-scrolling action-platformer spinoff of Namco’s famous horror arcade series.
    3. Sweet Home (1989): Developed by Capcom and directed by Kazuo Tokuro, this survival-horror RPG served as the direct spiritual predecessor to the Resident Evil franchise.
    4. Crisis Force (1991): A breathtaking vertical-scrolling shooter by Konami that pushed the Famicom hardware to its absolute limit with fast-paced action and zero sprite flicker.

    Economic Value for Collectors

    For retro game collectors on a budget, collecting Japanese Famicom games is often far more economical than collecting North American NES titles. Iconic titles like Super Mario Bros., Rockman (Mega Man), and Dracula Densetsu (Castlevania) are frequently available at a fraction of the price of their North American cartridge counterparts.

    How to Integrate the Famicom into a Modern Setup

    If you are looking to add Japanese 8-bit gaming to your personal setup, there are several practical ways to approach hardware compatibility:

    MethodVideo Output QualityCompatibilityRecommended For
    Original HVC-001 FamicomRF (Coaxial) Only100% Native 60-PinPurists willing to perform AV/RGB mods
    AV Famicom (HVC-101)Composite AV (RCA)100% Native + Detachable ControllersBest original hardware experience
    NES + Cartridge AdapterComposite / RGB (Depends on NES)High (60-to-72 pin passive adapter)Gamers who already own an NES
    FPGA / Clone SystemsHDMI (1080p Crystal Clear)Excellent (Native Cartridge Slots)Modern TV displays and casual play

    Note: If you purchase an original Japanese console, ensure you use a power supply compatible with your local region’s electrical grid standards to prevent damage to the internal voltage regulator.

    Conclusion

    The Japanese Famicom is far more than a nostalgic relic; it is a foundational milestone in interactive media history. From its vibrant crimson design and innovative microphone integration to its sophisticated audio expansion capabilities, the console represents Nintendo at its most creative and ambitious.

    Whether you choose to explore its library through original hardware, specialized FPGA consoles, or cartridge converters, delving into the Famicom universe offers a fascinating fresh perspective on the 8-bit era.

    Community Discussion

    Do you collect Japanese Famicom cartridges, or do you stick strictly to regional NES releases? What are your favorite expanded-audio chiptune soundtracks? Share your thoughts, questions, and favorite hidden gems in the comments section below!

  • RG34XXSP Retro Handheld Review

    By Super Asurada 77 | Retro Joy Lab

    Hello everyone, this is Super Asurada 77.
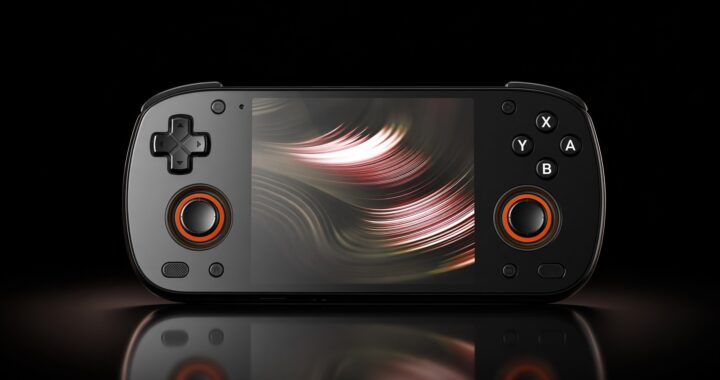

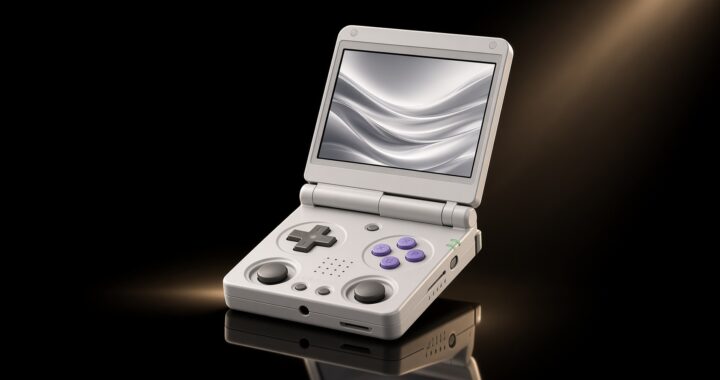
    Meet the RG34XXSP, a retro handheld console in a clamshell (foldable) design with a 3.4-inch screen
    absolutely perfect for portable gaming on the go.

    You can toss it casually into your bag without worry and still enjoy your favorite classics anywhere.

    The build quality is excellent — and it even lets you have fun with stickers and color customization.
    Yes, I tried decorating mine with some stickers too!


    It weighs only 180 grams, which makes it incredibly lightweight and easy to carry around.


    The D-pad and ABXY buttons are fairly quiet — not silent, but quiet enough.
    In a library, you might hear a faint click,
    but in a noisy environment like the subway, it’s barely noticeable.

    Note: The RG35XXSP doesn’t have an analog stick,
    but the RG34XXSP does. So keep that in mind!


    If you’ve used any of the Anbernic OS devices before,
    the interface here will feel instantly familiar.


    You can decorate your game list with cover images,
    but unfortunately, video previews aren’t supported.


    You can adjust the screen angle like this —
    but honestly, it’s a bit awkward while gaming.


    The TF1 slot holds the microSD card that contains the operating system.

    You can store your games on the same card,
    or insert a separate game card into TF2,
    but I recommend using TF1 for both OS and games.

    If you load from TF2, the system will always ask
    “TF1 or TF2?” every time you browse games — it gets annoying fast.

    You can adjust the volume using the dedicated side buttons.


    Here are the shoulder buttons (L1, L2, R1, R2)
    they’re not loud, which is nice.

    Charging is simple: just plug a USB Type-C cable
    into the USB/OTG port.


    You’ll find the power and reset buttons here.
    If you press and hold the power button while the clamshell is closed,
    it’ll turn on automatically.

    If you ever find it powered on inside your bag,
    it probably got triggered by pressure on that power button.

    The TF2/EXT slot is where you can insert another SD card for extra games.

    The LED indicators show charge status:

    • Bottom LED lights up during charging
      • Red = low battery
      • Orange = mid charge
      • Off = fully charged
    • Top LED shows battery level while in use
      • Green = good
      • Red = low battery warning

    The headphone jack is located on the bottom.
    It doesn’t get in the way while gaming.

    Performance-wise, it handles PS1 and below flawlessly.

    PSP games also work —
    especially 2D titles like Super Robot Wars, which run quite smoothly.

    Performance is on par with other Anbernic RG35XX series devices.

    After about an hour of play, the console gets slightly warm —
    nothing to worry about.


    The stock Anbernic OS includes a music player app.
    You can load MP3s and listen even with the clamshell closed.

    However, be careful —
    if the shoulder buttons get pressed while it’s in your pocket,
    it might skip, pause, or restart your track.

    Also, there’s no resume function
    once you exit the app, it won’t remember where you left off.


    You can also play old encoded video files
    the OS includes a built-in video player.
    Even with the lid closed, playback continues.


    Both 3-pole and 4-pole headphones work perfectly —
    sound output is clean and strong.


    When charging, always use a 5V 1.5A or 5V 2A charger
    with a KS certification mark (or equivalent safety approval).

    ⚠️ Important Safety Tips:

    • Do NOT use 9V fast chargers or mixed 5V/9V adapters
      they may damage the board.
    • Avoid 5V 1A chargers as well; they can overheat.
    • Always turn off the device before charging.
    • Never leave it charging unattended while you sleep.

    You never know what might happen — safety first!


    Final Thoughts

    If you’re a beginner looking for a clamshell-style retro handheld mainly for PS1-era or older games,
    the RG34XXSP is a great starting point.

    It’s compact, durable, and easy to carry —
    a perfect travel companion for quick retro gaming sessions.

    I personally use it all the time for on-the-go gaming.

    Enjoy your retro gaming life!
    🎮 — Super Asurada 77

    Original article in Korean: [link]

  • Retroid Pocket 5 Mini V2 – Hands-On Review

    By Super Asurada 77 | Retro Joy Lab

    Retroid has released both the Retroid Pocket 5 and its smaller sibling, the Pocket 5 Mini.
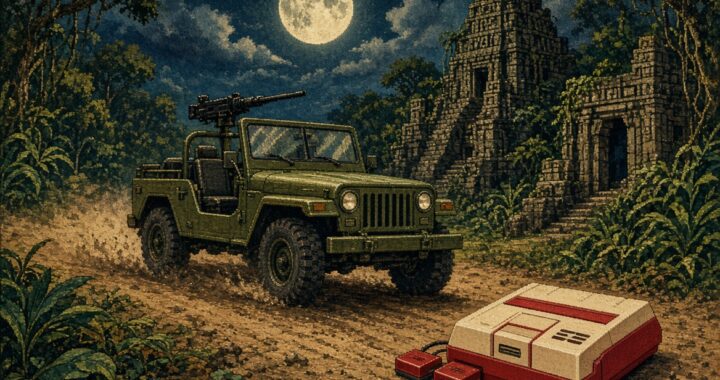
    However, many users complained about the smaller screen size.

    Then, quite suddenly, Retroid dropped the V2 version — and it’s now officially available on their website.
    I managed to get my hands on one and gave it a proper test.


    One of the biggest strengths of the Pocket 5 Mini is its light weight.

    The regular Pocket 5 weighs about 282 g, but the Mini tips the scale at only 233 g — incredibly light.
    Among all handhelds in the 200-gram class, this one easily leads in performance.

    It uses the same Snapdragon 865 chipset as the Pocket 5 — the very same chip found in the Galaxy S20 Plus.

    Unlike smartphones that can throttle performance due to heat (since they lack a fan),
    the Pocket 5 Mini includes active cooling, keeping frame drops under control even during demanding games.


    Performance:
    Even at 3× internal resolution, PS2 games run smoothly without lag.

    Kunoichi — a game that usually stutters on many handhelds — runs beautifully on this device.


    Onimusha 2 also plays effortlessly.


    Tekken 5 runs perfectly fine too.


    Even Super Robot Wars Impact performs like a charm.

    However…

    When you open the map view, things get tough for us 40- or 50-something gamers with aging eyes.

    It’s really hard to tell the units apart! On the 2D tactical map, you can only distinguish red and blue units —
    but identifying the individual mechs is nearly impossible, even with the upgraded 3.9-inch display.


    On PSP, the screen appears slightly cropped at the top and bottom — so everything looks smaller.


    If you adjust the display scaling in the PSP emulator, it becomes much more comfortable to watch.


    At 1:1 aspect ratio, it feels crisp and clear —


    But returning to the original ratio makes it tiny again.
    Oh, my eyes… if only I could get my youth back!


    Nintendo DS requires some tweaking too — the left and right edges may get cut off depending on the layout.


    Still, NDS games run extremely well.


    If the Pocket 5 Mini V2 handles Tekken 5 smoothly, then Tekken 3 (PS1) is absolute perfection.
    Even when you crank up all the graphical enhancements in the core settings, it doesn’t break a sweat.


    Famicom (NES) originally had an 8:7 pixel aspect ratio,
    but on CRT TVs it was stretched to 4:3.
    With the emulator set to 8:7, you get a much more natural and satisfying view.


    Super Famicom (SNES) uses a similar ratio — set it to 8:7 and it looks fantastic on the V2 screen.
    This is one of the biggest visual advantages of the new version.


    Game Boy titles, with their nearly 1:1 aspect ratio, look perfect on the V2 display.


    Neo Geo Pocket games also match beautifully with this screen.


    And Game Boy Color runs wonderfully as well.
    You can enjoy most portable console titles in their original aspect ratios,
    almost identical to the feel of real hardware.


    Surprisingly, even Game Boy Advance titles look good —
    though you’ll notice thin letterbox bars on top and bottom, the image fits the V2 display naturally.


    I also compared PS2 gameplay between the Pocket 5 and Pocket 5 Mini V2.
    The difference? Practically none in performance.
    However, those tiny map screens will definitely test your eyesight!


    When it comes to Super Famicom games, the V2’s native 8:7 ratio really shines.
    Despite the smaller screen, it doesn’t feel cramped compared to the Pocket 5.


    Same goes for Famicom titles.


    NDS games are surprisingly enjoyable too.


    Interestingly, GBA graphics even appear sharper on the Mini V2 —
    whereas on the Pocket 5 you can clearly see the pixel grid.


    When it comes to Game Boy, the Pocket 5 Mini V2 wins hands down.

    If you enjoy long sessions — say, a full hour of Super Robot Wars
    you’ll appreciate the comfort and lightness.

    For comparison: playing the same game on the Odin 2 while lying down
    can make your wrist ache after an hour.
    The Mini V2, however, feels feather-light.


    Verdict

    If you value portability and want to enjoy classic consoles like the Famicom and Super Famicom
    in their authentic screen ratios, the Retroid Pocket 5 Mini V2 is highly recommended.

    It’s also a great choice for those who want smooth PS2 performance in a compact form.

    However, if your eyesight isn’t what it used to be,
    you might be happier sticking with the Pocket 5 instead — the larger display makes a real difference.


    A Few Notes

    • Bluetooth audio can disconnect occasionally in the subway — more often than on the Pocket 5 —
      but it only happens in weak-signal areas.
    • Charging: Supports fast charging.
      Don’t use a 5 V 1 A charger — it may overload and overheat.
      Always use 5 V 2 A or 9 V chargers for safety.

    Enjoy your retro gaming life!
    🎮 — Super Asurada 77

    Original article in Korean: [link]

  • Konami’s Jackal: How to Beat the Ultimate 8-Bit Run-and-Gun Classic

    Hello everyone — SuperAsurada77 here!
    Today I’m bringing you another classic Famicom game that even us middle-aged gamers (with the power of save states, of course) can conquer without breaking our thumbs.
    The text might be short, but the screenshots are plenty — so buckle up, this might be a long one!


    🚙 1988 – Konami’s Military Rescue Classic

    Released in 1988 by Konami, Jackal is a top-down run-and-gun shooter where a single jeep and four elite soldiers are dropped deep behind enemy lines.
    That’s right — just one jeep to take down an entire enemy army. No backup, no tanks, no reinforcements. Just pure 8-bit insanity.


    Stage 1 – Into Enemy Territory

    Our tiny jeep parachutes into the battlefield — and the mission begins.

    Along the way, you’ll find small buildings holding POWs. Blow them up with grenades or missiles to free your captured comrades.
    It’s a mystery how they survive the explosions unscathed… but hey, let’s not ask questions. Just rescue them!

    Some POWs glow when you pick them up — rescuing these VIPs upgrades your grenades to missiles, and with each rescue, your missile blast radius grows even larger.

    Halfway through the stage, you’ll spot a friendly helicopter waiting under heavy enemy fire. Drive close and your rescued soldiers will board the chopper.
    How they all fit into one jeep — and how the helicopter isn’t shredded by bullets — is another mystery. But again… just rescue them. 😄

    Boss Fight:
    Multiple blue tanks will swarm you. Dodge their shots and take them down one by one.
    Your thumbs will start screaming here, but hey — it’s only Stage 1.

    “YEAHHHH!” shout your rescued comrades. Your thumbs? “NOOOOO!”


    Stage 2 – The Temple Fortress

    The second mission takes place in what looks like an ancient temple. Rescue more POWs and get them to the extraction chopper before facing the boss.

    Boss: A massive stone statue.
    Dodge the smaller tanks and focus your missiles on the statue. It fires homing missiles, but with precise D-pad control, you can avoid them.
    Come on — we’re 40-somethings, we drive cars. This is nothing!

    Once again: “YEAHHHH!” from the soldiers, and “ARRRGHH!” from your thumbs.


    Stage 3 – Harbor Assault

    The action shifts to a busy port with laser defenses. This is where save states truly become your best friend. Don’t feel guilty — stress-free gaming is the goal!

    Boss: …an aircraft carrier.
    Yes, somehow your lone jeep is going to blow up a carrier. It’s ridiculous — and that’s exactly why we love it.

    “YEAHHHH!”
    Your thumbs? Numb. Your wrist? Tingling. On to Stage 4!


    Stage 4 – Swamp Warfare

    The swamp slows your movement significantly — avoid it as much as possible. Rescue more comrades and prepare for another tough fight.

    Boss: A giant helicopter.
    Normally, Rambo would take this thing out with a bow… but since he’s not here, you’ll have to do it with a jeep. 😅
    Shoot down paratroopers, dodge the tanks, and keep firing until the chopper explodes.


    Stage 5 – Enemy Headquarters

    You’re near the enemy HQ now, and things get chaotic: flamethrowers, landmines, helicopters — everything they’ve got is coming your way.
    Even under this barrage, you’re still rescuing POWs and getting them out. What a hero.

    Boss: The heavily guarded main gate.
    Destroy the turrets and the tank hangars. Once the power is cut, the gates will open and you’ll storm the base.

    At this point, your hands are probably screaming louder than the enemy soldiers. 😂


    Final Stage – The Fortress Showdown

    Inside the enemy stronghold, things get brutal.
    Laser cannons blast the ground, leaving craters you can’t cross. Your D-pad skills will be pushed to the limit.

    Destroy both laser turrets — but you’re not done yet. The main building must also be destroyed with heavy missile fire.

    Just when you think it’s over… a massive tank rolls in. Dodge its main cannon and keep firing.

    When it turns red, it’s close to defeat. Stick to the pattern: shoot, dodge, shoot, dodge.

    Finally, the tank explodes — mission complete!


    🎖️ Mission Complete

    Four brave soldiers have rescued countless POWs and now gaze at the sunset from their jeep.
    “Press Start” appears on the screen…

    Start again? Nah. My thumbs and wrists need a vacation after one playthrough. 😅


    🕹️ Final Thoughts

    Jackal is one of those games that perfectly captures the charm and madness of 8-bit gaming.
    It’s absurd, intense, hilarious, and deeply satisfying — especially for retro gamers over 40 looking to blow off some steam with save states.

    You’re not just playing a game. You’re rescuing comrades, saving the day, and laughing at the ridiculousness of blowing up an aircraft carrier with a jeep.

    Mission accomplished, soldier. 🫡

    Original article in Korean: [link]

  • How to Beat Contra (1988) – Tips, Boss Strategies & Retro Memories

    Hello everyone — SuperAsurada77 here!
    Today, I’m bringing you another retro classic that even us middle-aged gamers (with a little help from save states) can actually beat.
    This is not a one-credit challenge. Life is already stressful enough — with kids, wives, jobs, and society piling on pressure every day, why add more stress by trying to 1CC a 1980s action game? 😅

    This post might look long because of the many screenshots, but trust me — it’s worth it.


    🪖 1988: KONAMI’s Legendary Run-and-Gun

    Back in 1988, Konami released Contra — one of the most iconic run-and-gun shooters ever made.
    In Korea, we used to call it “Hondra” for some reason.
    Fun fact: Konami’s leadership actually hated the game business despite being a game-making powerhouse. And yet, Contra became a timeless classic when it hit the Famicom/NES.


    Stage 1 – Jungle Assault

    We’ve all been stuck replaying the first stage over and over again as kids. But with the magic of save/load, you can finally break through.

    Boss: Technically, it’s a building — but yes, it’s the boss.
    Crawl into position beneath each gun turret and unleash rapid fire.
    We Korean gamers have done real military training — standing fire, kneeling fire, prone fire — so this is nothing. 😂


    Stage 2 – 3D Base Attack

    After destroying the entrance, you infiltrate the enemy base. This stage blew our minds back in the day — a 3D-style base run in an 8-bit game!

    Stay prone to dodge the relentless bullets. Destroy the blue glowing cores in the center to advance. When the bullets stop, stand and fire.

    Boss: Looks like a giant 1940s supercomputer. The blue energy shots can be destroyed with bullets. Keep moving and use turbo fire to blast it down.


    Stage 3 – Mountain Mayhem

    Here come the rolling boulders! Use save/load liberally — this stage is tough.

    Boss: Alien vibes incoming. Destroy the arms first, then unload on the head for the win.


    Stage 4 – Another Base Battle

    Back to the 3D base gameplay. The same tactics work — and you’ll need them. You’ll probably die a lot here, but don’t give up!

    Boss: Another giant machine, plus enemy soldiers. Hold your ground and keep firing. Then suddenly… a spaceship appears out of nowhere. By now, your D-pad reflexes should be godlike — use them to survive.


    Stage 5 – Winter Warfare

    The pixel art here is peak 8-bit nostalgia — snowy and atmospheric.

    Mini-Boss: Spray and pray. Just keep shooting until it goes down.

    Boss: An alien UFO! The Contra universe just keeps expanding.
    Shoot both the ship and its projectiles. When it disappears and reappears, bombard it with bullets again.


    Stage 6 – The Boss Gauntlet

    This entire stage is basically a boss fight. You’ll lose a few lives — and that’s okay.
    Just like how we “pay” for a new console with house chores or gifts for our wives, you’ll need to sacrifice some lives to win here. 😂

    Boss: Jump over its attacks, shoot the weak points, and don’t stop firing — even if it throws weird weapons at you. You’ll probably beat it after losing a couple of lives.


    Stage 7 – Brutal Battles

    This level is as hard as any boss fight. Blast through the walls with rapid fire.

    Boss: Absolutely brutal. The two purple turrets at the bottom fire three shots upward — hard to dodge, hard to hit. If you run out of lives, it’s okay to continue. Remember: this is still easier than raising kids or listening to your wife’s lectures. 😆


    Stage 8 – The Final Mission

    And then… aliens. Of course.
    We all saw it coming — and yes, they probably paid for the license. 😂

    Mid-Boss: Easy work.

    Final Boss: The Alien Queen herself. If you’ve made it this far, victory is within reach. Sacrifice a few lives and finish the job!


    🎉 The Ending – A Hero’s Reward

    Our heroes complete the mission and escape the island by helicopter as the credits roll. No post-credit scenes here — just sore fingers, tired wrists, and strained eyes. Reward them with a couple of eye drops and a good stretch.

    Congratulations!
    You’ve defeated the evil Red Falcon and saved the universe. Think of yourself as a hero… though, like any hero, you’re rewarded with nothing but “passion pay.” 😅

    And yet, tomorrow we’ll still get on the train and head home after another long day. That’s life — and that’s Contra.


    🕹️ Final Thoughts

    Contra isn’t just a game — it’s a time machine back to our childhood, and a great stress reliever for anyone over 40. With save states on your side, you can conquer it. So grab your controller, load those save files, and unleash hell on Red Falcon.

    Good luck, soldiers — and happy gaming!

    Original article in Korean: [link]

  • RoboCop (Famicom) – A Game Even 40-Somethings Can Beat!

    Hi everyone, this is SuperAsurada77 here.

    Today I want to introduce a game that even us middle-aged retro gamers in our 40s can actually finish.

    Back in 1987, RoboCop premiered in theaters here in Korea. I was still in elementary school then, so I couldn’t watch it on the big screen. A few years later in middle school, I finally got to see it on VHS — and it absolutely blew my mind. It instantly became one of my all-time favorite movies.

    Of course, there was a RoboCop arcade game too, but beating even the first-stage boss ED-209 with a single coin was nearly impossible. Later, I borrowed the RoboCop cartridge for the Famicom from a friend and gave it a try.
    Funny thing — the cartridge was a pirate copy, so RoboCop wouldn’t die even when hit. Thanks to that little “feature,” I actually managed to clear the game!

    Fast forward to today, and I decided to replay it. And to my surprise, I found myself clearing each stage — okay, with a bit of “save and load” magic, but still. 😂

    Just like in the movie, you can rescue hostages, take on ED-209 in a showdown, and even switch weapons with the Start button.

    There’s a factory mission where you hunt down and eliminate the mid-boss, and with some effort, victory is possible there too.

    In the movie, RoboCop takes out the mid-boss with a spike-like USB that shoots out of his fist. In the game, however, you’ll need to chip away at his health.

    The final boss is, of course, ED-209 again. While RoboCop blasts him apart with a single rifle shot in the film, here the fight is tougher — if you’re not careful, you might even lose due to the time limit.

    Once you’ve defeated the final enemy, the ending plays out much like the movie: the villain takes the OCP chairman hostage, but once the chairman fires him, RoboCop is no longer restricted by “Directive 4” and can finish the job with one shot.

    “Directive 4” is what prevents RoboCop from attacking OCP executives — but once the villain hears “You’re fired!” he’s no longer protected. The chairman calmly steps aside, and RoboCop does the rest.


    The villain tumbles out of the building and meets his end. Even though the background is just black pixels, you can feel the justice being served.

    The credits roll, and the game ends. Sadly, the iconic final moment — when the chairman asks RoboCop for his name and he answers “Murphy” — isn’t included. A missed opportunity!

    But overall, this is a game that anyone in their 40s and up can definitely clear.
    Sure, running out of time can feel frustrating, but that’s part of the fun. 😂

    Have fun playing — and enjoy the nostalgia trip! 👊

    Original article in Korean: [link]