[태그:] Super Famicom

  • SNES 1CHIP Explained: Why Collectors Prefer It and How to Identify One

    Super Famicom / SNES 1CHIP: Why Collectors Hunt It and How to Spot One

    The Super Nintendo Entertainment System (SNES) and its Japanese counterpart, the Super Famicom, went through multiple motherboard revisions during their long production run. The most talked-about change arrived around 1995 when Nintendo combined the main CPU and the two Picture Processing Units (PPU1 and PPU2) into a single custom chip. These later boards are known as 1CHIP models (labeled SNS-CPU-1CHIP-01, -02, or -03).
    For many retro enthusiasts who care about video quality—especially when using RGB SCART cables, upscalers like the OSSC or RetroTINK, or high-end CRTs—the 1CHIP is the preferred original hardware.

    Main Advantages of the 1CHIP

    The biggest benefit is video quality.

    Earlier “2-chip” (or 3-chip) boards produced a noticeable horizontal blur or soft smear on RGB output. The separate video chips and the way the signal was processed created a low-pass filtering effect. The 1CHIP design eliminates most of that interference. The result is:

    • Sharper, cleaner pixel edges
    • Better contrast and more defined colors
    • Reduced horizontal smearing
    • A picture that looks closer to what modern emulation or FPGA cores deliver

    This difference is most obvious on RGB connections. On composite or RF the gap is smaller, but RGB is where the 1CHIP truly shines. Many collectors and content creators specifically seek 1CHIP units for cleaner capture and more accurate-looking gameplay on modern displays or high-quality CRTs.

    Other practical upsides include slightly lower power draw and a more modern single-chip architecture that generally ages well when capacitors are replaced.

    Important Caveats

    The 1CHIP is not perfect:

    • The stock RGB signal is often too bright, which can cause mild washing-out or ringing. A simple three-resistor mod (750 ohm) usually corrects this.
    • Some units show slight ghosting.
    • A small number of games have minor graphical quirks (rare top-line garbage or timing differences).
    • The final revision (1CHIP-03) does not output composite sync on the multi-out port by default, so you may need a sync-on-luma cable or a small restore mod.

    Despite these points, most people who prioritize sharp RGB still prefer a properly adjusted 1CHIP over earlier boards.

    How to Identify a 1CHIP Console

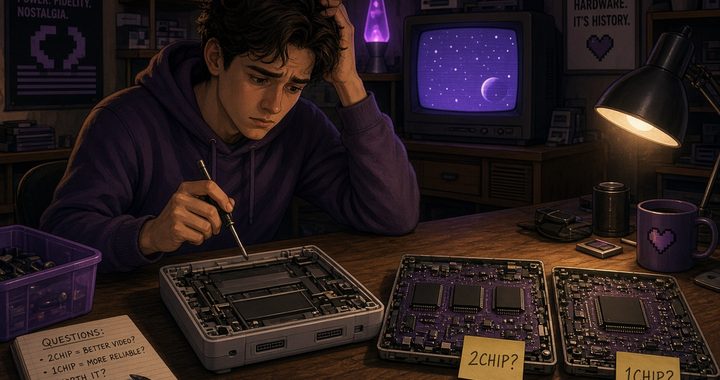
    1. Open the console (most reliable method) Use a 4.5 mm Gamebit screwdriver to remove the top shell. Look at the motherboard near the cartridge slot. You should see silkscreen text that clearly reads:

    • SNS-CPU-1CHIP-01
    • SNS-CPU-1CHIP-02
    • SNS-CPU-1CHIP-03

    (There are equivalent labels on Super Famicom and PAL boards.) You will also notice one large square chip (the S-CPUN) instead of the separate CPU + two PPU chips found on earlier boards.

    2. Serial number clues (North American SNES) Many 1CHIP units carry serial numbers starting with UN3. This is a strong indicator but not 100% proof—case swaps exist. Treat “UN3” as a useful filter when shopping online, then verify by opening the unit if possible.

    3. Expansion port check (quick external hint on some models) On the bottom of the console there is a small expansion door. On certain boards you can peek inside:

    • Three solder dots usually mean a 2-chip board.
    • A partial circular ring or different layout often indicates 1CHIP.

    This method is helpful but less definitive than reading the silkscreen.

    4. Super Famicom (Japanese) note Japanese Super Famicom units do not have a reliable external serial-number shortcut like the North American UN3 prefix. Opening the console is essentially required for confirmation.

    Quick Comparison

    FeatureEarly 2-Chip Boards1CHIP Boards
    Video ChipsSeparate CPU + PPU1 + PPU2Single integrated S-CPUN chip
    RGB SharpnessSoft / blurredNoticeably sharper
    Color & ContrastMore muted / smearedCleaner and more vibrant
    Brightness (stock)Generally balancedOften too bright (easy fix)
    Rarity & PriceCommon, cheaperLess common, higher demand
    Best ForMaximum compatibilityBest possible RGB picture

    Buying Tips for Collectors

    • Ask sellers for clear photos of the motherboard silkscreen. “1CHIP” claims without board photos should be treated cautiously.
    • If you plan to use RGB, a 1CHIP-01 or 1CHIP-02 is usually the easiest starting point. The -03 revision needs a bit more attention regarding sync.
    • Budget for a capacitor replacement and the brightness resistor mod if you want the best results.
    • The later SNES Jr. (SNS-101) also uses the same 1CHIP architecture and can look excellent once RGB is restored, though it lacks some original ports.

    The 1CHIP did not change how the Super Nintendo plays games in any dramatic way, but it did give the system a cleaner, sharper video output that many modern collectors value highly. Whether you are building a high-end RGB setup or simply want the best original-hardware picture possible, knowing how to identify and evaluate these late-production boards is one of the most useful skills in SNES collecting.

    If you already own a console and are unsure which revision you have, the safest answer is always the same: open it up and read the board.

  • Recommended Ninja Protagonist Games from the 8-bit & 16-bit Era

    (NES / Famicom, SNES / Super Famicom, Sega Genesis / Mega Drive, TurboGrafx-16 / PC Engine)

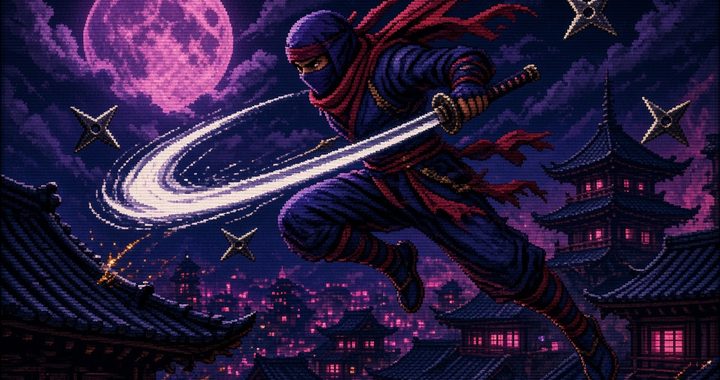
    In the late 1980s and early 1990s, ninjas ruled the arcades and living rooms. Fast, stylish, and often brutally difficult, ninja action games became a staple of the 8-bit and 16-bit generations. Here are two standout titles featuring ninja protagonists on each of the four major systems of the era that still hold up for modern retro players.

    Nintendo Entertainment System (Famicom)

    1. Ninja Gaiden (1988 Japan / 1989 North America) Tecmo’s masterpiece stars Ryu Hayabusa, the Dragon Ninja, on a quest for revenge after his father’s murder. What set this game apart was its cinematic cutscenes (a rarity on the NES), tight wall-climbing and sword combat, and an infamous difficulty curve that still frustrates and delights players today. The combination of precise platforming, secondary weapons (shuriken, fire wheels, etc.), and dramatic storytelling made it a defining ninja experience of the 8-bit generation.

    2. Shadow of the Ninja (1990) Developed by Natsume, this underrated gem lets you play as either Hayate or Kaede (or both in simultaneous co-op) as they infiltrate a dystopian future America ruled by the evil Emperor Garuda. The game features excellent climbing and hanging mechanics, weapon upgrades (katana to kusarigama), and a dark, stylish atmosphere. It plays like a more cooperative, slightly more approachable cousin to Ninja Gaiden and remains one of the best pure ninja action games on the system.

    Super Nintendo Entertainment System (Super Famicom)

    1. The Legend of the Mystical Ninja (1991 Japan / 1992 North America) Konami’s colorful take on the Ganbare Goemon series follows the mystical ninja Goemon (Kid Ying in the West) and his eccentric partner Ebisumaru (Dr. Yang). Blending side-scrolling action, town exploration, mini-games, and light adventure elements, it offers a much more lighthearted and humorous take on the ninja theme. The dual-character co-op, catchy music, and quirky Japanese humor make it a delightful contrast to the darker ninja games of the era.

    2. Hagane: The Final Conflict (1994 Japan / 1995 North America) You control Hagane, a cyborg ninja rebuilt after his clan is wiped out, seeking revenge and the recovery of a powerful artifact. This late-era SNES title mixes classic ninja moves (wall jumps, flips, multiple weapons including sword, chain, shuriken, and bombs) with a cyberpunk aesthetic. Fast, fluid, and challenging, it feels like a spiritual successor to Shinobi and Ninja Gaiden with impressive 16-bit production values.

    Sega Genesis (Mega Drive)

    1. The Revenge of Shinobi (1989) Joe Musashi returns in this stylish sequel that perfected the formula. Beautiful Stage 1 music by Yuzo Koshiro, smooth ninjutsu powers, and a perfect balance of platforming and combat made this one of the early showcases for the Genesis. The combination of shuriken throwing, sword strikes, and special ninjutsu techniques still feels fantastic.

    2. Shinobi III: Return of the Ninja Master (1993) Widely regarded as one of the best pure action games on the Genesis, Shinobi III gives Joe Musashi even better controls, more varied stages, and a refined difficulty curve. Running, sliding, wall-jumping, and the classic shuriken + sword combat reach their peak here. Many consider this the high point of the classic Shinobi series.

    TurboGrafx-16 (PC Engine)

    1. Ninja Spirit (1990) Irem’s excellent port of their own arcade game stars the ninja Moonlight (Tsukikage) seeking revenge for his father’s death. What makes it special is the ability to switch freely between four weapons (katana, shuriken, bombs, and kusarigama) and the ability to summon shadow clones. The TG-16 version is extremely close to the arcade original and stands as one of the system’s strongest pure action titles.

    2. Shinobi (1989 – primarily Japan) Asmik’s HuCard port of Sega’s classic arcade game brings Joe Musashi to the PC Engine. While it trims some content compared to the arcade (most notably Stage 2 and the bonus stages), the core gameplay, graphics, and speed remain excellent. For fans of the original Shinobi, this is still a very enjoyable version and a nice companion piece to Ninja Spirit on the same hardware.


    These eight games capture the full range of what “ninja game” meant in the 8- and 16-bit eras — from the punishing cinematic platforming of Ninja Gaiden to the colorful humor of Mystical Ninja, the cyberpunk style of Hagane, and the refined action of the Shinobi series.

    Whether you’re rediscovering these classics on original hardware, emulators, or modern re-releases (Nintendo Switch Online, etc.), they remain some of the most satisfying and atmospheric action games of their generation.

  • RG34XXSP Retro Handheld Review

    By Super Asurada 77 | Retro Joy Lab

    Hello everyone, this is Super Asurada 77.

    Meet the RG34XXSP, a retro handheld console in a clamshell (foldable) design with a 3.4-inch screen
    absolutely perfect for portable gaming on the go.

    You can toss it casually into your bag without worry and still enjoy your favorite classics anywhere.

    The build quality is excellent — and it even lets you have fun with stickers and color customization.
    Yes, I tried decorating mine with some stickers too!


    It weighs only 180 grams, which makes it incredibly lightweight and easy to carry around.


    The D-pad and ABXY buttons are fairly quiet — not silent, but quiet enough.
    In a library, you might hear a faint click,
    but in a noisy environment like the subway, it’s barely noticeable.

    Note: The RG35XXSP doesn’t have an analog stick,
    but the RG34XXSP does. So keep that in mind!


    If you’ve used any of the Anbernic OS devices before,
    the interface here will feel instantly familiar.


    You can decorate your game list with cover images,
    but unfortunately, video previews aren’t supported.


    You can adjust the screen angle like this —
    but honestly, it’s a bit awkward while gaming.


    The TF1 slot holds the microSD card that contains the operating system.

    You can store your games on the same card,
    or insert a separate game card into TF2,
    but I recommend using TF1 for both OS and games.

    If you load from TF2, the system will always ask
    “TF1 or TF2?” every time you browse games — it gets annoying fast.

    You can adjust the volume using the dedicated side buttons.


    Here are the shoulder buttons (L1, L2, R1, R2)
    they’re not loud, which is nice.

    Charging is simple: just plug a USB Type-C cable
    into the USB/OTG port.


    You’ll find the power and reset buttons here.
    If you press and hold the power button while the clamshell is closed,
    it’ll turn on automatically.

    If you ever find it powered on inside your bag,
    it probably got triggered by pressure on that power button.

    The TF2/EXT slot is where you can insert another SD card for extra games.

    The LED indicators show charge status:

    • Bottom LED lights up during charging
      • Red = low battery
      • Orange = mid charge
      • Off = fully charged
    • Top LED shows battery level while in use
      • Green = good
      • Red = low battery warning

    The headphone jack is located on the bottom.
    It doesn’t get in the way while gaming.

    Performance-wise, it handles PS1 and below flawlessly.

    PSP games also work —
    especially 2D titles like Super Robot Wars, which run quite smoothly.

    Performance is on par with other Anbernic RG35XX series devices.

    After about an hour of play, the console gets slightly warm —
    nothing to worry about.


    The stock Anbernic OS includes a music player app.
    You can load MP3s and listen even with the clamshell closed.

    However, be careful —
    if the shoulder buttons get pressed while it’s in your pocket,
    it might skip, pause, or restart your track.

    Also, there’s no resume function
    once you exit the app, it won’t remember where you left off.


    You can also play old encoded video files
    the OS includes a built-in video player.
    Even with the lid closed, playback continues.


    Both 3-pole and 4-pole headphones work perfectly —
    sound output is clean and strong.


    When charging, always use a 5V 1.5A or 5V 2A charger
    with a KS certification mark (or equivalent safety approval).

    ⚠️ Important Safety Tips:

    • Do NOT use 9V fast chargers or mixed 5V/9V adapters
      they may damage the board.
    • Avoid 5V 1A chargers as well; they can overheat.
    • Always turn off the device before charging.
    • Never leave it charging unattended while you sleep.

    You never know what might happen — safety first!


    Final Thoughts

    If you’re a beginner looking for a clamshell-style retro handheld mainly for PS1-era or older games,
    the RG34XXSP is a great starting point.

    It’s compact, durable, and easy to carry —
    a perfect travel companion for quick retro gaming sessions.

    I personally use it all the time for on-the-go gaming.

    Enjoy your retro gaming life!
    🎮 — Super Asurada 77

    Original article in Korean: [link]

  • Retroid Pocket 5 Mini V2 – Hands-On Review

    By Super Asurada 77 | Retro Joy Lab

    Retroid has released both the Retroid Pocket 5 and its smaller sibling, the Pocket 5 Mini.
    However, many users complained about the smaller screen size.

    Then, quite suddenly, Retroid dropped the V2 version — and it’s now officially available on their website.
    I managed to get my hands on one and gave it a proper test.


    One of the biggest strengths of the Pocket 5 Mini is its light weight.

    The regular Pocket 5 weighs about 282 g, but the Mini tips the scale at only 233 g — incredibly light.
    Among all handhelds in the 200-gram class, this one easily leads in performance.

    It uses the same Snapdragon 865 chipset as the Pocket 5 — the very same chip found in the Galaxy S20 Plus.

    Unlike smartphones that can throttle performance due to heat (since they lack a fan),
    the Pocket 5 Mini includes active cooling, keeping frame drops under control even during demanding games.


    Performance:
    Even at 3× internal resolution, PS2 games run smoothly without lag.

    Kunoichi — a game that usually stutters on many handhelds — runs beautifully on this device.


    Onimusha 2 also plays effortlessly.


    Tekken 5 runs perfectly fine too.


    Even Super Robot Wars Impact performs like a charm.

    However…

    When you open the map view, things get tough for us 40- or 50-something gamers with aging eyes.

    It’s really hard to tell the units apart! On the 2D tactical map, you can only distinguish red and blue units —
    but identifying the individual mechs is nearly impossible, even with the upgraded 3.9-inch display.


    On PSP, the screen appears slightly cropped at the top and bottom — so everything looks smaller.


    If you adjust the display scaling in the PSP emulator, it becomes much more comfortable to watch.


    At 1:1 aspect ratio, it feels crisp and clear —


    But returning to the original ratio makes it tiny again.
    Oh, my eyes… if only I could get my youth back!


    Nintendo DS requires some tweaking too — the left and right edges may get cut off depending on the layout.


    Still, NDS games run extremely well.


    If the Pocket 5 Mini V2 handles Tekken 5 smoothly, then Tekken 3 (PS1) is absolute perfection.
    Even when you crank up all the graphical enhancements in the core settings, it doesn’t break a sweat.


    Famicom (NES) originally had an 8:7 pixel aspect ratio,
    but on CRT TVs it was stretched to 4:3.
    With the emulator set to 8:7, you get a much more natural and satisfying view.


    Super Famicom (SNES) uses a similar ratio — set it to 8:7 and it looks fantastic on the V2 screen.
    This is one of the biggest visual advantages of the new version.


    Game Boy titles, with their nearly 1:1 aspect ratio, look perfect on the V2 display.


    Neo Geo Pocket games also match beautifully with this screen.


    And Game Boy Color runs wonderfully as well.
    You can enjoy most portable console titles in their original aspect ratios,
    almost identical to the feel of real hardware.


    Surprisingly, even Game Boy Advance titles look good —
    though you’ll notice thin letterbox bars on top and bottom, the image fits the V2 display naturally.


    I also compared PS2 gameplay between the Pocket 5 and Pocket 5 Mini V2.
    The difference? Practically none in performance.
    However, those tiny map screens will definitely test your eyesight!


    When it comes to Super Famicom games, the V2’s native 8:7 ratio really shines.
    Despite the smaller screen, it doesn’t feel cramped compared to the Pocket 5.


    Same goes for Famicom titles.


    NDS games are surprisingly enjoyable too.


    Interestingly, GBA graphics even appear sharper on the Mini V2 —
    whereas on the Pocket 5 you can clearly see the pixel grid.


    When it comes to Game Boy, the Pocket 5 Mini V2 wins hands down.

    If you enjoy long sessions — say, a full hour of Super Robot Wars
    you’ll appreciate the comfort and lightness.

    For comparison: playing the same game on the Odin 2 while lying down
    can make your wrist ache after an hour.
    The Mini V2, however, feels feather-light.


    Verdict

    If you value portability and want to enjoy classic consoles like the Famicom and Super Famicom
    in their authentic screen ratios, the Retroid Pocket 5 Mini V2 is highly recommended.

    It’s also a great choice for those who want smooth PS2 performance in a compact form.

    However, if your eyesight isn’t what it used to be,
    you might be happier sticking with the Pocket 5 instead — the larger display makes a real difference.


    A Few Notes

    • Bluetooth audio can disconnect occasionally in the subway — more often than on the Pocket 5 —
      but it only happens in weak-signal areas.
    • Charging: Supports fast charging.
      Don’t use a 5 V 1 A charger — it may overload and overheat.
      Always use 5 V 2 A or 9 V chargers for safety.

    Enjoy your retro gaming life!
    🎮 — Super Asurada 77

    Original article in Korean: [link]